Brain segmentation with median_otsu
We show how to extract brain information and mask from a b0 image using DIPY’s
segment.mask module.
First import the necessary modules:
import numpy as np
import nibabel as nib
Download and read the data for this tutorial.
The scil_b0 dataset contains different data from different companies and
models. For this example, the data comes from a 1.5 Tesla Siemens MRI.
from dipy.data.fetcher import fetch_scil_b0, read_siemens_scil_b0
fetch_scil_b0()
img = read_siemens_scil_b0()
data = np.squeeze(img.get_data())
img contains a nibabel Nifti1Image object. Data is the actual brain data as
a numpy ndarray.
Segment the brain using DIPY’s mask module.
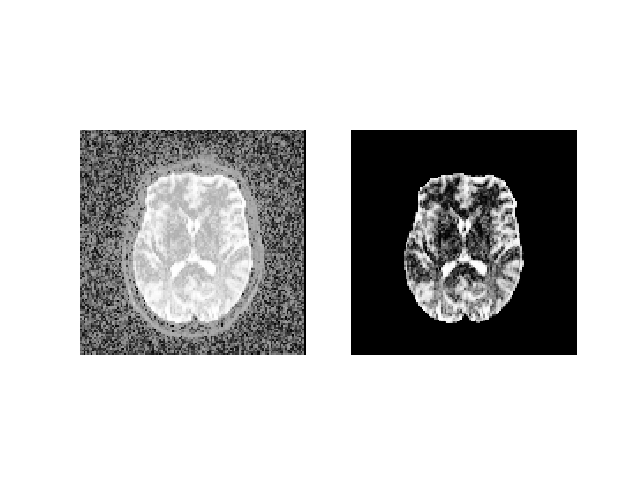
median_otsu returns the segmented brain data and a binary mask of the brain.
It is possible to fine tune the parameters of median_otsu (median_radius
and num_pass) if extraction yields incorrect results but the default
parameters work well on most volumes. For this example, we used 2 as
median_radius and 1 as num_pass
from dipy.segment.mask import median_otsu
b0_mask, mask = median_otsu(data, median_radius=2, numpass=1)
Saving the segmentation results is very easy using nibabel. We need the
b0_mask, and the binary mask volumes. The affine matrix which transform the
image’s coordinates to the world coordinates is also needed. Here, we choose to
save both images in float32.
mask_img = nib.Nifti1Image(mask.astype(np.float32), img.affine)
b0_img = nib.Nifti1Image(b0_mask.astype(np.float32), img.affine)

fname = 'se_1.5t'
nib.save(mask_img, fname + '_binary_mask.nii.gz')
nib.save(b0_img, fname + '_mask.nii.gz')
Quick view of the results middle slice using matplotlib.
import matplotlib.pyplot as plt
from dipy.core.histeq import histeq

sli = data.shape[2] // 2
plt.figure('Brain segmentation')
plt.subplot(1, 2, 1).set_axis_off()
plt.imshow(histeq(data[:, :, sli].astype('float')).T,
           cmap='gray', origin='lower')

plt.subplot(1, 2, 2).set_axis_off()
plt.imshow(histeq(b0_mask[:, :, sli].astype('float')).T,
           cmap='gray', origin='lower')

plt.savefig('median_otsu.png')

An application of median_otsu for brain segmentation.
median_otsu can also automatically crop the outputs to remove the largest
possible number of background voxels. This makes outputted data significantly
smaller. Auto-cropping in median_otsu is activated by setting the
autocrop parameter to True.
b0_mask_crop, mask_crop = median_otsu(data, median_radius=4, numpass=4,
                                      autocrop=True)
Saving cropped data using nibabel as demonstrated previously.
mask_img_crop = nib.Nifti1Image(mask_crop.astype(np.float32), img.affine)
b0_img_crop = nib.Nifti1Image(
    b0_mask_crop.astype(np.float32), img.affine)
nib.save(mask_img_crop, fname + '_binary_mask_crop.nii.gz')
nib.save(b0_img_crop, fname + '_mask_crop.nii.gz')
Example source code
You can download the full source code of this example. This same script is also included in the dipy source distribution under the doc/examples/ directory.
